

Your web browser is out of date. Update your browser for more security, speed, and the best experience on this site.
You may also visit the site on your mobile device.
Schedule Groups have been around for a long time. First and foremost, Schedule Groups are used to group people in your workforce and give you another configuration option in your UKG platform if labor accounts, additional information, and custom fields aren't enough for you.
You can see this assignment from the People Record as well as the Schedule Editor. Here is a quick image from the People Record. Located on the Job Assignment tab, and Scheduler category: 
Click the drop-down arrow in the Group Assignment field and select a schedule group. That's it! Now remember that if you don't have any schedule groups created, nothing will appear in this list. To create a Schedule Group, you have to go to the Schedule Editor. Since we will be assigning a Schedule Group, let's do it from there as well.
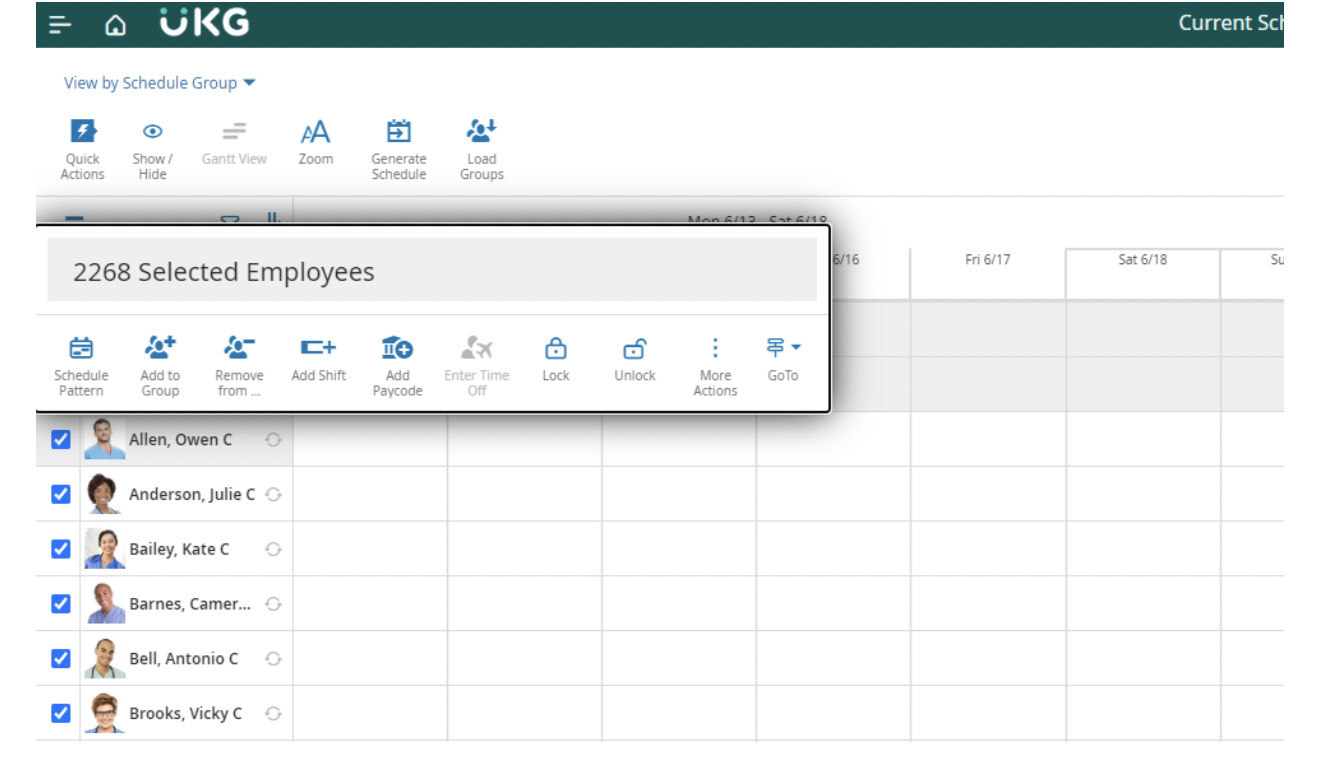
From the Schedule Editor, simply click the By Group tab.
All of your employees will be assigned to the Ungrouped Employees schedule group. You can see this as a bolded name, with all of the employees below it. The arrow brings attention to it in the image above. So what we have to do is create the Schedule Group, then assign it.
Frankly, creating a Schedule Group is the easiest part of this process as long as you can access Setup in Workforce Timekeeper. If not, then you will need to find someone with access.
It's easy to find. Click the Setup link, and go to the box titled Scheduler Setup and find the Schedule Groups link. It's about half way down. Click on that and you have hit the Schedule Groups workspace. Here's a look:
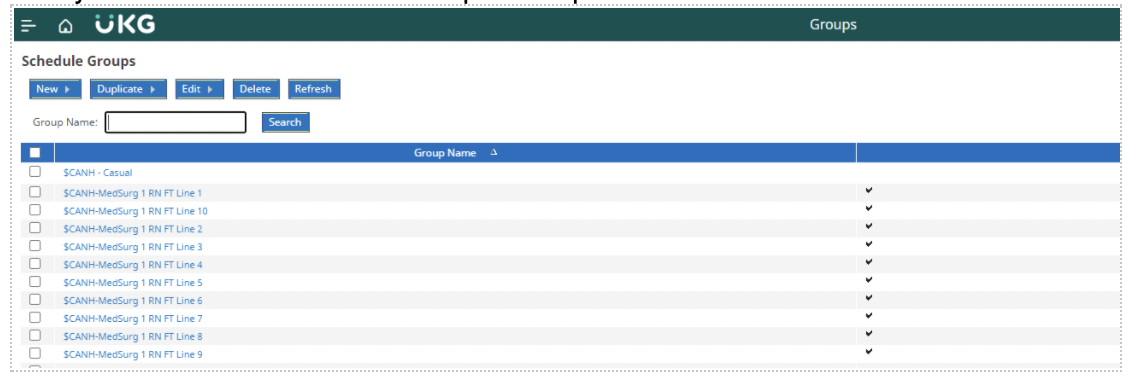
The screen above highlights the "New" button, as you need that to create new schedule group. Heck, it's in the name. A list of Schedule Groups appears as well. The arrow points you to those. (They would be easier to read if they weren't blurred to protect the innocent.)
Next, click the New button and your work is almost done. The Schedule Group Editor displays and you only have three more things to do: Name it, Inherit it and Save it. Here's a look:
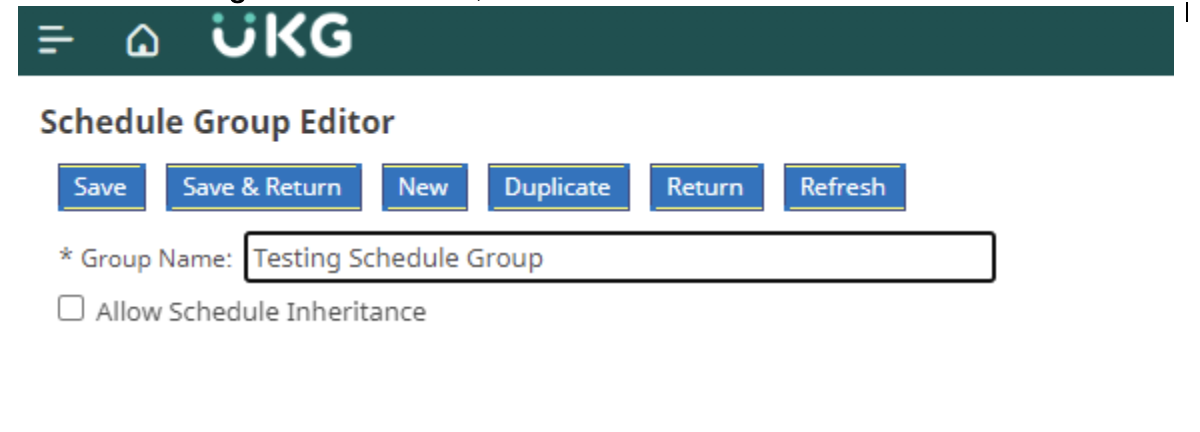
Naming it is easy enough. But, keep in mind, it's a good idea to have a naming convention for your Schedule Groups. It's just easier to recognize them if you do. Once the group is named, click the Allow Schedule Inheritance checkbox. Then, make sure it's checked. Finally, go back and make sure it's checked again. Schedule Inheritance is a really great feature, so let's make sure we have allowed for it. (We will talk more about Schedule Inheritance in our next post.)
Once complete, click the Save button. You are thrown back to the Schedule Group workspace and your new schedule group displays. Fantastic, you are on your way. Now that the group is created, let's put it in a schedule.
Once a Schedule Group has been created, it has to be loaded in the schedule, again, easy stuff. To do this, you hop back to the Schedule Editor. Now, click the By Group tab and then Group in the Action menu. Here's a look:
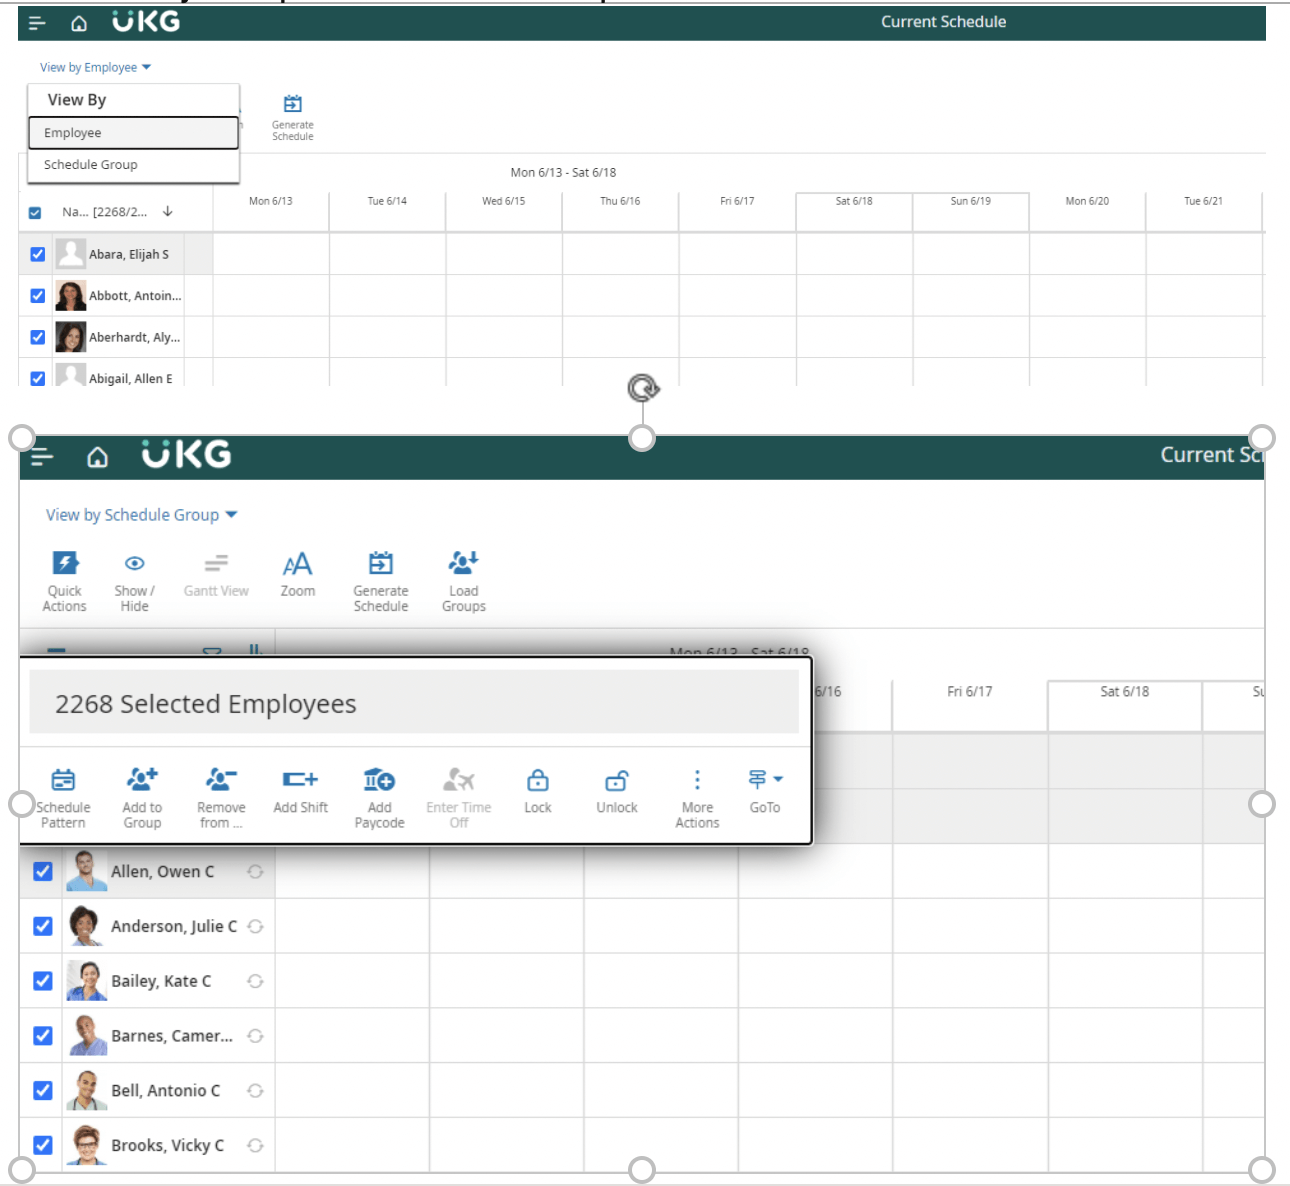
The arrow is pointing to the Group tab, and the Group menu is circled. Click the Load Group link. The Load Group dialog box displays. Click the drop-down arrow and choose the schedule group you created. Done and done.
You will see the schedule group in the Schedule Editor now, but there's a catch. The schedule group will only STAY in the Schedule Editor provided there are employees assigned to it. If you don't assign an employee to it, then log off, the loaded Schedule Group will need to be loaded again the next time you get to the Schedule Editor. Just remember: If you load it, assign employees to it.
Remember what I said above. If you close out of the Schedule Editor now, the Schedule Group you loaded will disappear and you will have to reload it the next time you access the Schedule Editor. So, to add employees, highlight those employees in the Schedule Editor, then simply go back to the Groups tab and the Groups action menu, like so:
The Add To Group dialog box displays. Select the Schedule Group, Start Date and and End Date. By the way, it's a good idea to select Forever as the end date all the time. You may forget an End Date, which leaves assigned employees, well, unassigned to a schedule. By choosing Forever, you know the Schedule Group will always be there.
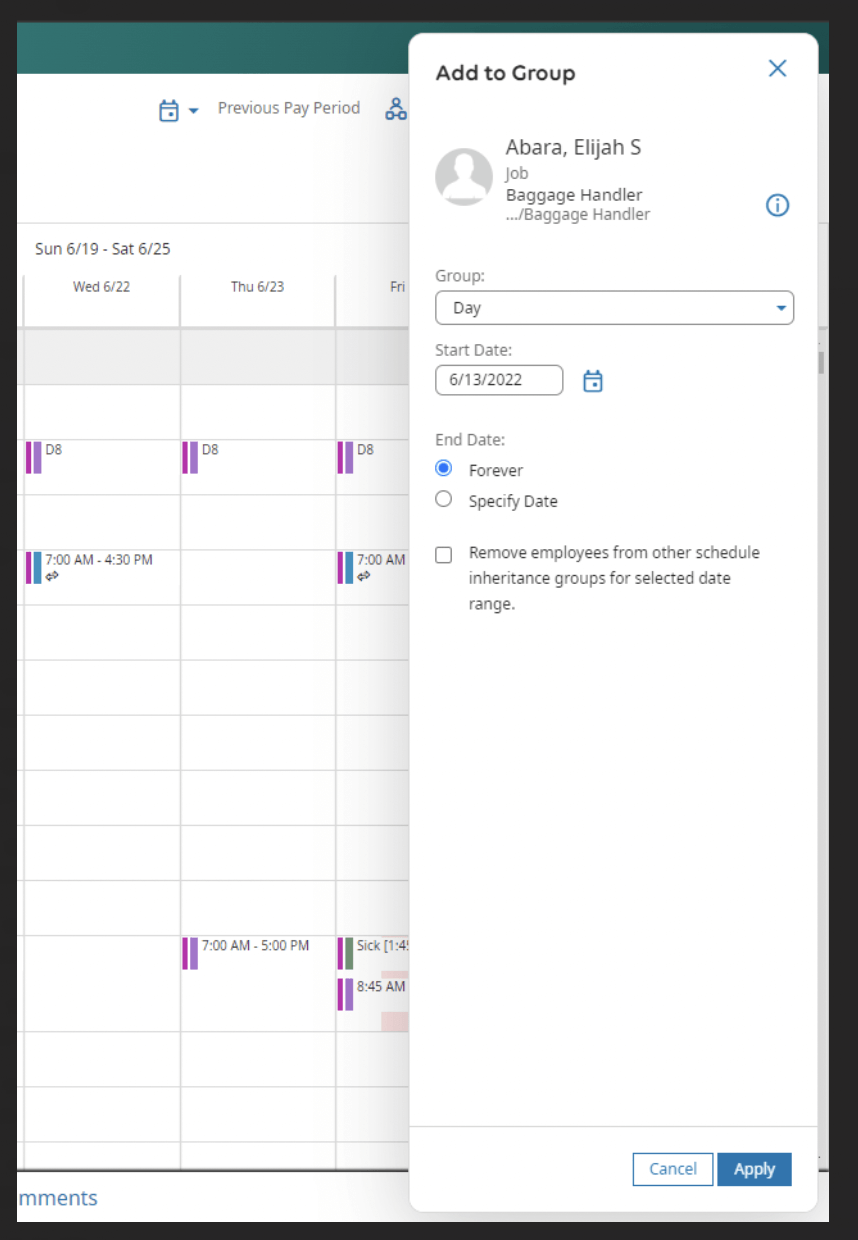
Oh, and don't miss the checkbox. I'm not going to repeat the name here because it is ridiculously long, but just know that when checked, the employees assigned to this Group will automatically start schedules that are assigned to this Group, and lose any schedules they were assigned to in previous groups. It's the way to go unless you want the employee to keep their previously assigned schedule.
Then click OK. That's it. Now you can see the Schedule Group you loaded with your select employees underneath. They are assigned.
And there they are!
You can remove an employee from a Schedule Group in the same manner that you added them. Do you remember the steps?
So, friends, that's how you create a Schedule Group. Remember that whether or not these employees are scheduled, they remain part of another group—a Schedule Group! In this post we covered the grouping function of schedule groups. In the next post, we will talk about Schedule Inheritance, a UKG functionality tool that can make your scheduling task a lot easier. So come on back—it's really good stuff.
Are you frustrated with your Kronos Workforce Central or UKG Workforce Dimensions platform? Does complex scheduling, changing staff, and workforce compliance issues have you frazzled? We get it and we can help. Improv is a team of certified UKG application consultants. We can partner with your team hourly, part-time, or even on a staff augmentation full-time basis. Just give us a call and let's get your UKG system running lean and mean!
Schedule a complimentary Discovery Call today!
Keep on learning! Download this useful guide on how to make Historical Corrections in UKG Workforce Central.

.png)
.png)
.png)
Comments